1. Raspberry Pi 2 B Cluster
1.1. Parts
| Item | Description | Dimensions (mm) | Unit Power (W) | Unit Price (¥) | Units | Price (¥) | Power (W) | Link | |
|---|---|---|---|---|---|---|---|---|---|
| Raspberry Pi 2 Model B | 单板机 Single Board Computer | 85 x 56 x 17 | 3.0 | MyCase | 258.00 | 10 | 2,580.00 | 36.0 | http://cn.element14.com/raspberry-pi-accessories?ICID=ap-rpi-2-hwb |
| NETGEAR GS308 | 8 口千兆交换机 1Gbps Network Switch | 158 x 102 x 26 | 3.8 | Max | 299.00 | 2 | 598.00 | 7.6 | http://item.jd.com/672092.html |
| ORICO DCP-4S-BK | 4 口 USB 充电器 5V2.4Ax4 USB-charger | 96 x 57 x 21 | 79.00 | 3 | 237.00 | http://item.jd.com/1208500.html | |||
| SAMZHE SZ-601BE | CAT.6E 网线 Network Cable | 1000 | 7.90 | 12 | 98.80 | http://item.jd.com/636308.html | |||
| SAMZHE BL-SZ03 | AM/Micro USB 数据线 USB-cable | 300 | 5.9 | 12 | 70.80 | http://item.jd.com/922605.html | |||
| SanDisk 16G Class 10 | Micro SD Card | 42.90 | 10 | 429.00 | http://item.jd.com/679772.html | ||||
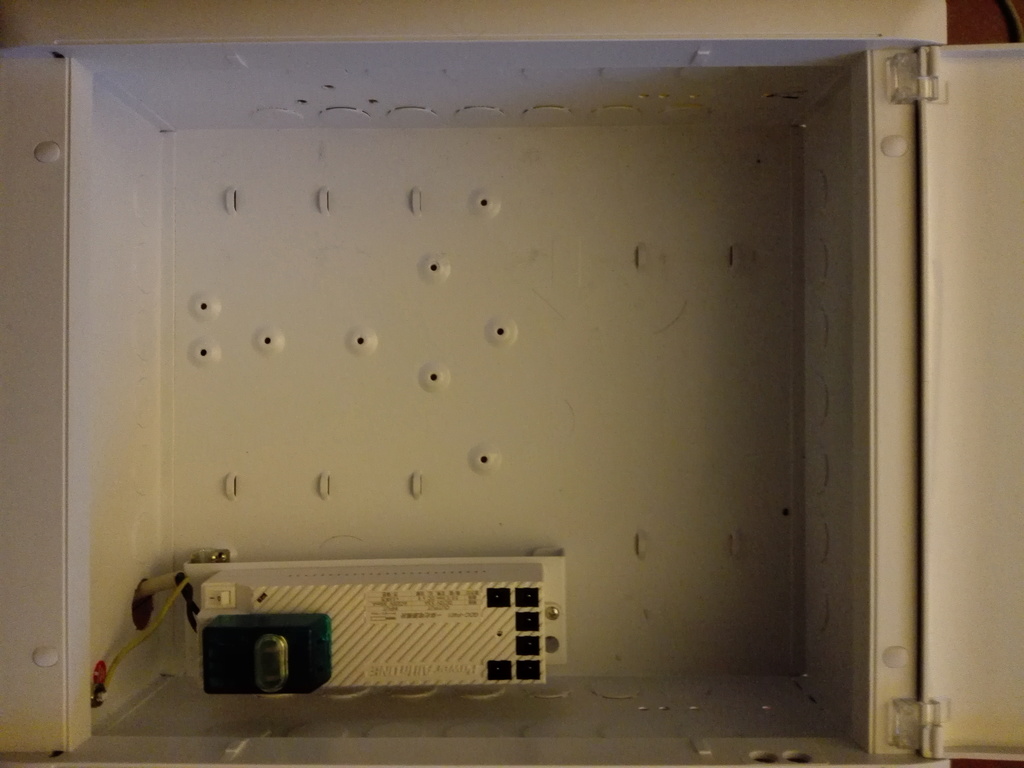
| e代家园 GRS11-35 | 配线箱 Case | 350 x 300 x 120 | 142.00 | 1 | 142.00 | http://detail.tmall.com/item.htm?id=40266420582 | |||
| e代家园 GDC-P01 | 电源模块插座 Power Supply | 165 x 49 x 36 | 40.0 | Output | 99.00 | 1 | 99.00 | 40.0 | http://detail.tmall.com/item.htm?id=42224837564 |
| MIG SL-303CB | 电源转换插座 Power Outlet | 54 x 40 x 33 | 19.90 | 1 | 19.90 | http://item.jd.com/899125.html | |||
| 单通铜螺柱 M2.5*20+6 | 0.36 | 36 | 12.96 | http://detail.tmall.com/item.htm?id=26930900577 | |||||
| 单通铜螺柱 M2.5*5+5 | 0.18 | 12 | 2.16 | http://detail.tmall.com/item.htm?id=26930900577 | |||||
| 双通铜螺柱 M2.5*20 | 0.28 | 12 | 3.36 | http://detail.tmall.com/item.htm?id=19636777951 | |||||
| GT-140M | 尼龙扎带(x1000) | 140 x 2.5 | 30.00 | 1 | 30.00 | http://detail.tmall.com/item.htm?id=36844630222 | |||
| 4,914.48 | |||||||||
Q: Why 2 x 8-port 1Gbits network switches?
A: 12 Pis use 12 ports. 2 switches will be connected together, thus use one port for each. We’ll leave 2 ports for external working network. 12 + 1x2 + 2 = 16
Q: Why choose this 4 port USB power charger?
A: The dimentions are perfect for 4 Pis, and the power input connector is standand 5V2.4A 5.5*2.5mm, which is just suitable for GDC-P01 power supply.
Q: How to connect 4 Pis together?
A: At the bottom, use 4 x M2.5*5 + 5 bolts; And 4 x M2.5*20 + 5 between two Pis; At the top, use 4 x M2.5*20. The total heigh is 90mm, when it stands on network switch (26mm heigt), it’s 116mm height, just suitable for the case’s height(120mm).
Q: Is the width of this case enough for 3 groups Pis?
A: Almost. Where you have to lower about 20mm the USB charger for the right group. Furtnately, when 2 network switches are placed one by one at the bottom, there is enough space left on the right side for the lowered USB charger.
Q: Is there still space for USB hard driver?
A: On the top-left side of the case, there is still space for about 4+ USB hard drivers, but you should choose the one that is about 110mm length, and put it vertically, Another choose is use 1.8” hard driver, just like me.
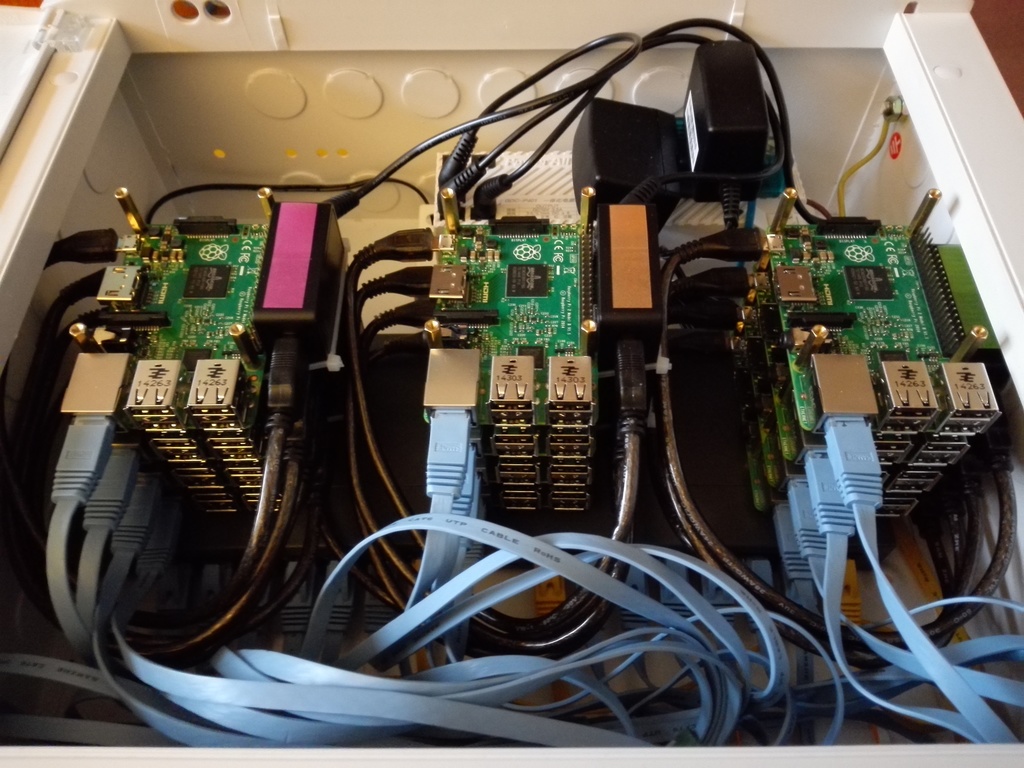
1.2. Installation - Hardware
Parts:
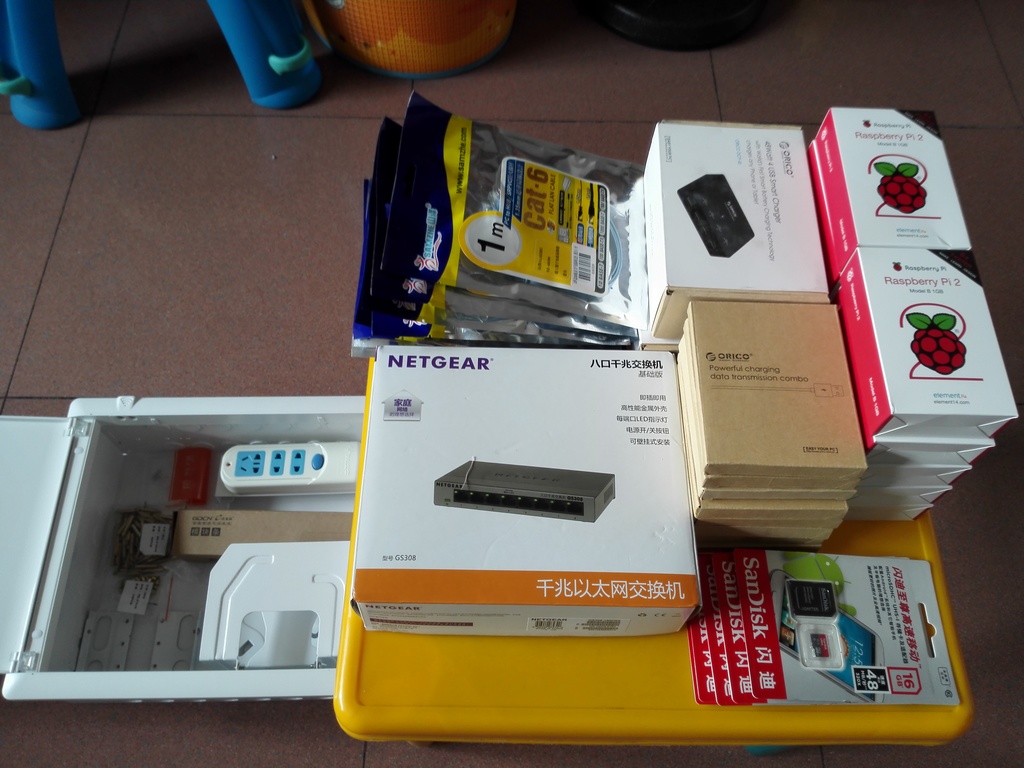
Bundled 4 x Raspberry Pis and 1 x USB Charger together as one group: height 90mm
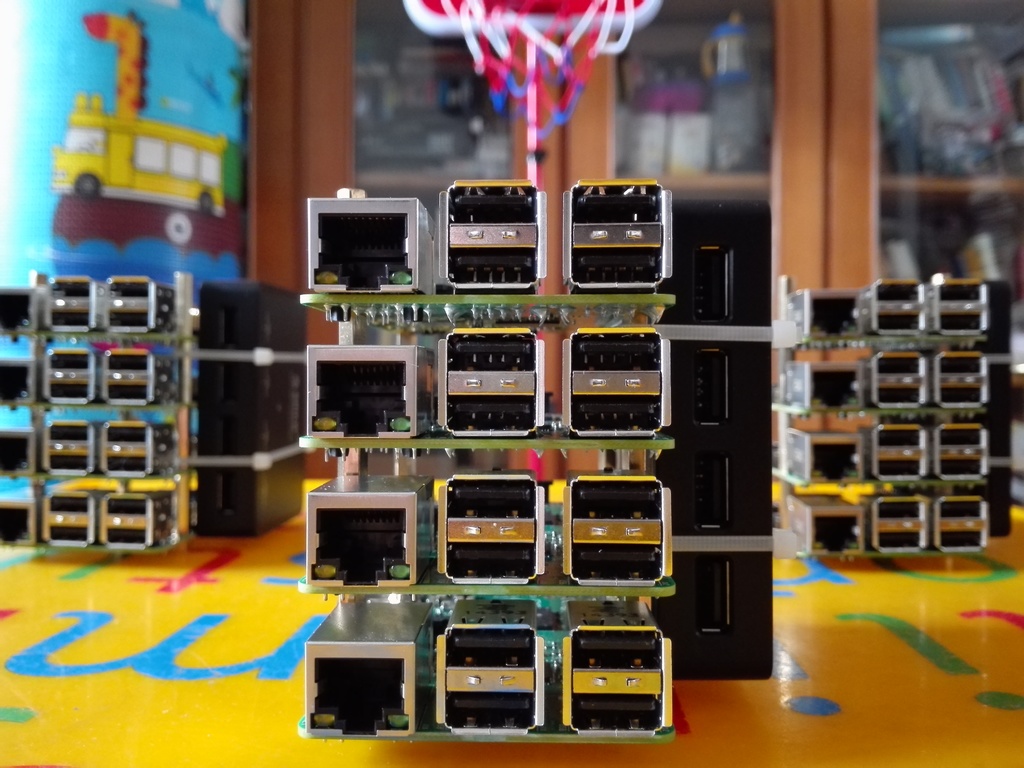
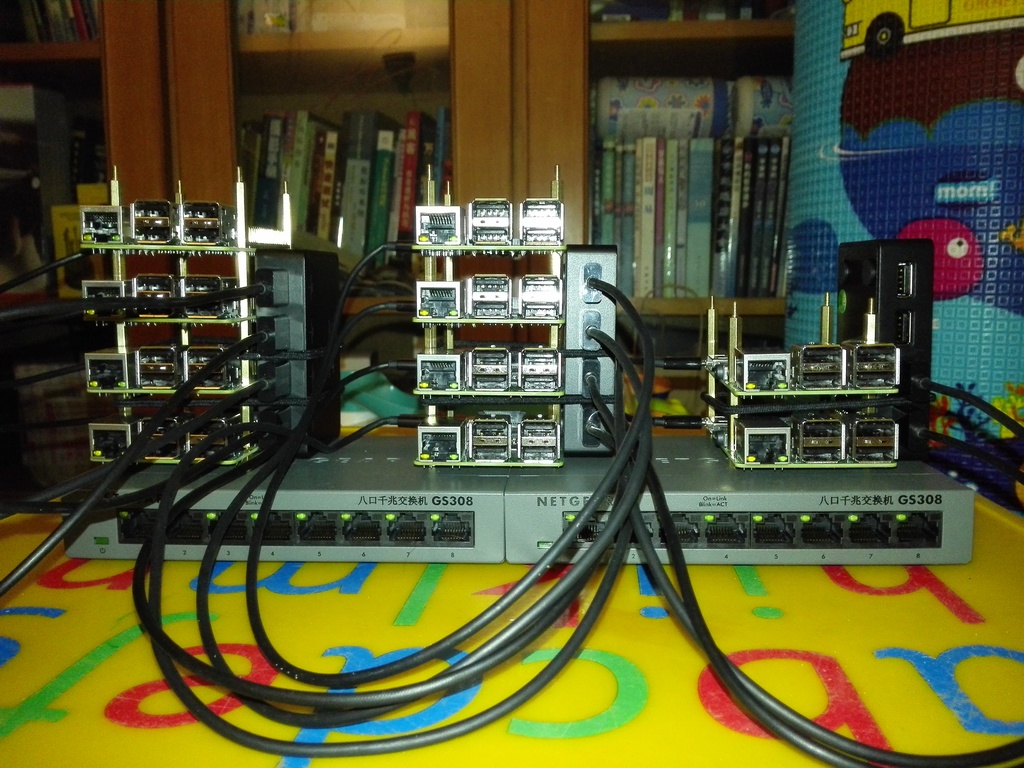
The layout: 3 x groups stand on 2 x 8-port network switches
The case with PSU installed
Finished:
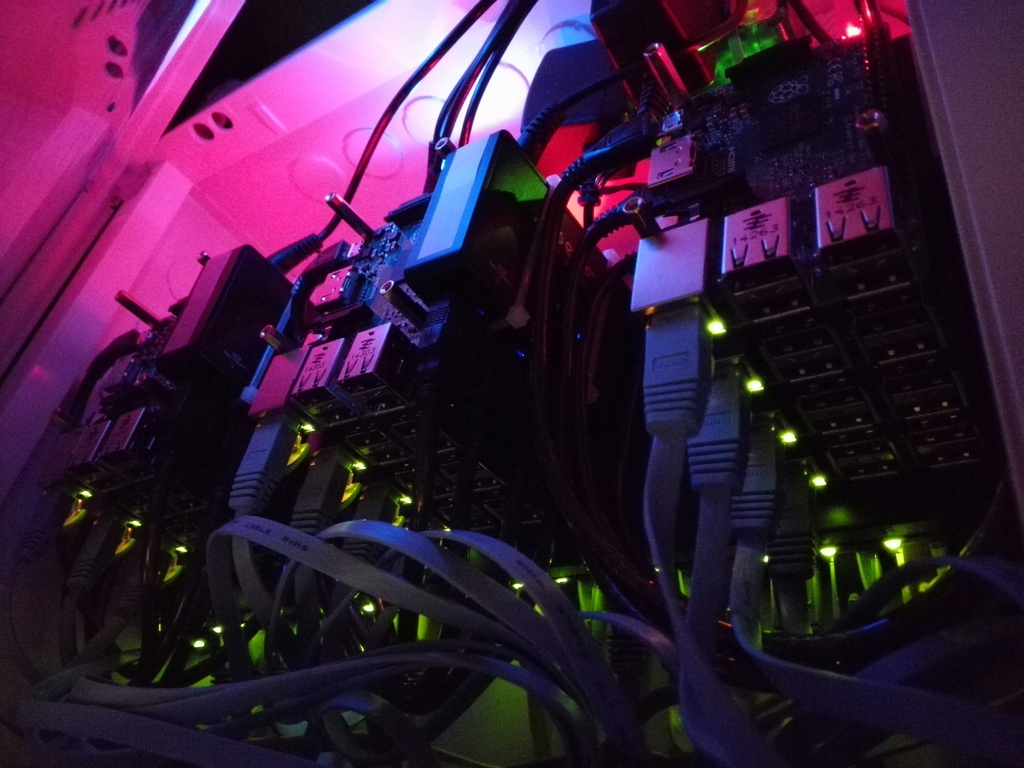
Lighting:
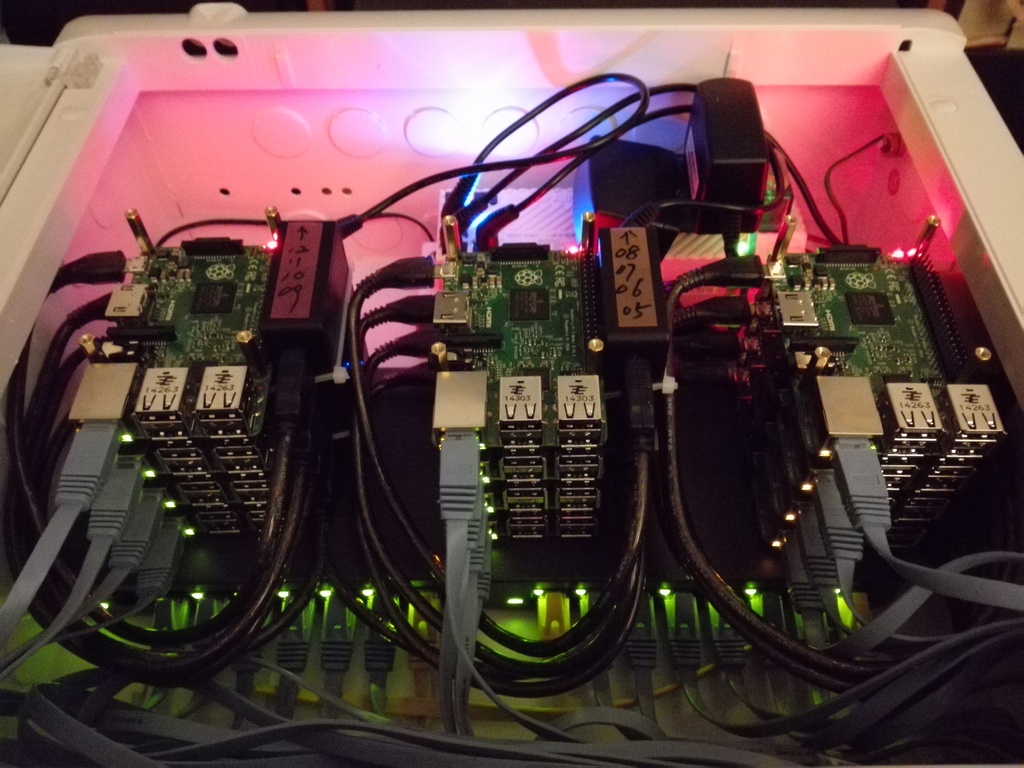
Lighting:
1.3. Installation - Software
- check SD card device name:
$ df h
/dev/mmcblk0p1 7.5G 2.8G 4.8G 37% /run/media/dcaoyuan/....
- umount SD card
$ umount /dev/mmcblk0p1
- dd image
$ sudo dd bs=4M if=~/2015-01-31-raspbian.img of=/dev/mmcblk0
$ sudo sync
- resizing partitions
$ ssh pi@192.168.2.201
password: raspberry
$ sudo raspi-config
selecting menu item:
EXPAND ROOTFS Expand Root Partition to Fill SD Card
reboot
- ssh login no password
$ ssh pi@pi01 mkdir -p .ssh
pi@pi01's password:

$ cat ~/.ssh/id_rsa.pub | ssh pi@pi01 'cat >> .ssh/authorized_keys'
pi@pi01's password:

$ ssh pi@pi01
- Extending the life of the SD card
$ vi /etc/fstab

tmpfs /tmp              tmpfs defaults,noatime,nosuid,size=100m                 0 0
tmpfs /var/tmp          tmpfs defaults,noatime,nosuid,size=30m                  0 0
tmpfs /var/log          tmpfs defaults,noatime,nosuid,mode=0755,size=100m       0 0
tmpfs /var/run          tmpfs defaults,noatime,nosuid,mode=0755,size=2m         0 0
tmpfs /var/spool/mqueue tmpfs defaults,noatime,nosuid,mode=0700,gid=12,size=30m 0 0
- Attach external USB hard drive
# All that max_usb_current=1 does is to set GPIO38 input high, which in turn turns on a
# FET, which connects a second 39K resistor in parallel to an existing one, on pin 5 of
# U13, the AP2553W6 USB power manager, lifting the current limit from 0.6A to double
# that (1.2A)

$ sudo vi /boot/config.txt
# Added line:
max_usb_current=1

$ sudo reboot

# Verify gpio38 value (should be set to high, ie. 1)
$ ls /sys/class/gpio
export gpiochip0  unexport
$ echo 38 > /sys/class/gpio/export
$ cat /sys/class/gpio/gpio38/value
1
- Mount external hard drive
$ sudo blkid
/dev/mmcblk0p1: SEC_TYPE="msdos" LABEL="boot" UUID="CB99-4C7E" TYPE="vfat"
/dev/mmcblk0p2: UUID="1263ae8d-aaf3-41b6-9ac0-03e7fecb5d6a" TYPE="ext4"
/dev/sda5: LABEL="NEWSMY" UUID="9A60889860887CAF" TYPE="ntfs"

$ sudo mkfs.vfat -n 'usbdisk' -I /dev/sda5
$ sudo blkid
/dev/mmcblk0p1: SEC_TYPE="msdos" LABEL="boot" UUID="CB99-4C7E" TYPE="vfat"
/dev/mmcblk0p2: UUID="1263ae8d-aaf3-41b6-9ac0-03e7fecb5d6a" TYPE="ext4"
/dev/sda5: LABEL="usbdisk" UUID="61A7-F4D8" TYPE="vfat"

$ sudo mkdir /media/usbhdd
$ sudo mount -t vfat -o uid=pi,gid=pi /dev/sdb5 /media/usbhdd

$ sudo vi /etc/fstab # add
UUID="61A7-F4D8" /media/usbhdd   vfat    defaults,uid=pi,gid=pi                 0 0

$ sudo reboot
$ df -h
- Change hostname
$ sudo hostname pi01

$ sudo vi /etc/hostname # change to
pi01

$ sudo vi /etc/hosts # add line
127.0.0.1 pi01

$ sudo /etc/init.d/hostname.sh start

$ exit
$ ssh pi@pi01
$ echo $HOSTNAME
pi01